
Batch BO-240314

Batch BO-240314

Quantity of Seeds: 2 soup spoons of brassica oleracea var. italica (broccoli)


Mar 14, 2024, 11:55 PM - Soaked the seeds in warm water and sat the bowl on a heating pad for a target time of 12 hours.

Mar 15, 2024, 10:40 AM - Removed the seeds from the water and placed them onto a growth tray. Placed two spacers onto the growth tray and covered the seeds with another tray to create a moisture barrier and a blackout condition.

Mar 15, 2024, 8:00 PM - Sprayed water onto the seeds to maintain moisture and inspected germination progress. Covered the tray to maintain blackout.

Mar 16, 2024, 6:00 PM - Sprayed water onto the seeds to maintain moisture and inspected germination progress. Observed signs of early germination from some seeds. Seeds that were brunched up too much were spread out more to increase separation. Covered the tray to maintain blackout.

Mar 17, 2024, 1:00 PM - Sprayed water onto the seeds to maintain moisture and inspected germination progress. Signs of germination can be spotted. Sprouts are slowly growing out from the seed and the roots are slowly growing below the silicon sheet. Bottom watering will start once the root is long enough to reach the water. No weight or pressure is applied to the seeds at this time to prevent standing water from condensation from touching the seeds.


Mar 18, 2024, 10:40 AM - Seeds are continuing to grow healthily. Sprayed water onto the seeds to maintain moisture and covered the tray to maintain blackout.


Mar 19, 2024, to Mar 22, 2024 - Once the roots are long enough for bottom watering to take place, the water tray is filled with water at or slightly below the growth tray level to keep the roots well watered. The top of the spouts are no longer sprayed with water to prevent mould and bacteria growth. Seeds are covered up with another tray with weight to maintain blackout conditions and to stress the spouts to grow taller during the process.


Mar 23, 2024, to Mar 24, 2024 - Removed the spouts from blackout and weight and exposed them to growth light for 8 hours per day (from 11 PM to 7 AM) and ambient room light at all other times.


Mar 25, 2024, to Mar 31, 2024 - The microgreen is becoming more green as the day passes. The growth tray is watered regularly to provide sufficient water for the microgreen's root. Exposed the microgreen to growth light for 8 hours per day (from 11 PM to 7 AM) and ambient room light at all other times. The 11 PM to 7 AM time was chosen so as not to interfere too much with daily activities around the home.

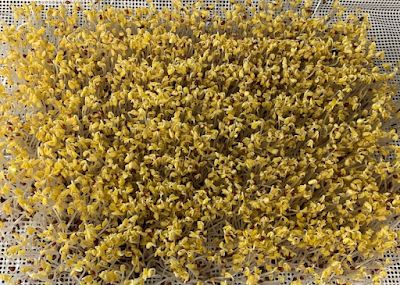
Apr 1, 2024 - Harvest Day! The microgreen is harvested after growing for 15 days.


Comments

Popular posts from this blog

Replacing a Honeywell T6069A with a Google Nest Thermostat

The Honeywell T6069A, while reliable in its time, may feel outdated compared to the sleek design and intuitive interface of the Google Nest Thermostat. With its minimalist aesthetic and vibrant display, the Nest Thermostat seamlessly blends into any modern home decor. Its user-friendly interface makes it easy to adjust settings and program schedules, ensuring effortless control over your home's temperature. In the ever-evolving landscape of smart home technology, one area that has seen significant advancement is thermostat technology. If you're considering upgrading your home's heating and cooling control system, replacing your old Honeywell T6069A thermostat with a Google Nest Thermostat could be a game-changer. Let's explore why making this switch is a step towards enhanced comfort, convenience, and energy efficiency in your home. Disclaimer: I am not an electrician nor an HVAC expert. I am just sharing my experience and NOT providing any instruction or advice on how

Microgreen Cuisine

Microgreens have taken the culinary scene by storm with their delicate textures, intense flavours, and nutrient-packed goodness.  Wondering how to incorporate your plentiful harvest into your everyday meal?  Microgreens have extremely versatile culinary applications from enhancing the visual appeal of your plates to infusing them with a burst of fresh flavors. Not to mention, they are a powerhouse of nutrients. In this blog post, we'll explore the diverse and creative ways you can elevate your dishes using these miniature greens. Join us on this culinary journey as we uncover the endless possibilities and delectable delights that microgreens bring to the table. Broccoli Microgreens Taste Profile : Nutty, earthy with a hint of sweetness. Similar taste to mature broccoli but milder Daikon Radish Microgreens Taste Profile : Spicy and crunchy Daikon Microgreens can transform a simple salmon uramaki into a delicately fancy gourmet dish. Wasabi Microgreens Taste Profile : Spicy, thoug

A Guide to Microgreens and Their Nutritional Benefits

In recent years, microgreens have taken the culinary world by storm, not only for their vibrant colours and delicate flavours but also for their remarkable nutritional benefits. These miniature versions of vegetables and herbs are harvested at an early stage of growth, typically when they have developed their first true leaves. Among the plethora of options, broccoli, sunflower, daikon radish, Oregon giant peas (or green peas), alfalfa, yellow mustard, and red cabbage stand out to me as both easy to grow and packed with essential nutrients.  Let's delve into the cultivation of these microgreens in a hydroponic setting and explore the health advantages they offer. Broccoli Microgreens    Broccoli (Brassica oleracea var. italica) microgreens are rich in sulforaphane, a compound known for its potent anti-inflammatory and anti-cancer properties. They are also abundant in vitamins A, C, and K, as well as minerals like potassium and calcium. I've been growing broccoli microgreens for